
Unzip elasticjob-console-${version}.tar.gz and execute bin\start.sh.
Open the browser and visit http://localhost:8899/ to access the console.
8899 is the default port number. You can customize the port number by entering -p through the startup script.
The console provides two types of accounts: administrator and guest.
The administrator has all operation rights, and the visitors only have the viewing rights.
The default administrator user name and password are root/root,and the guest user name and password are guest/guest,You can modify the administrator and guest user names and passwords through conf\application.properties.
auth.root_username=root
auth.root_password=root
auth.guest_username=guest
auth.guest_password=guest
The console have integrated Casdoor. We can choose it for SSO.
Step1: Deploy Casdoor
Casdoor code in GitHub: https://github.com/casdoor/casdoor
Here a example for development mode. More
Backend
go run main.go
Frontend
cd web
yarn install
yarn start
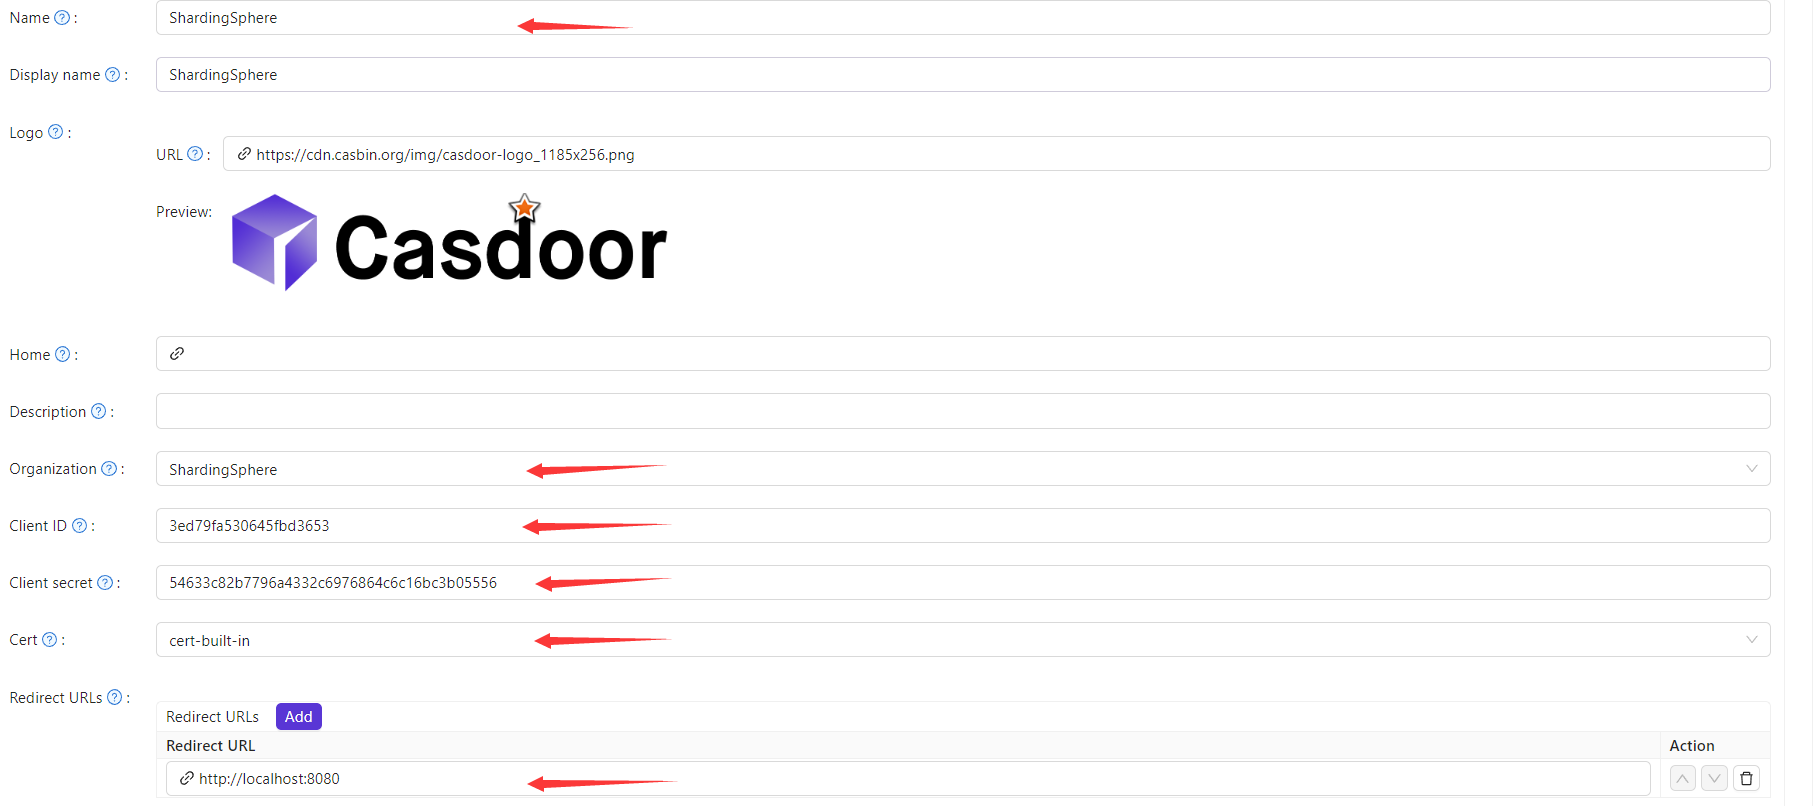
Step2:Configure Casdoor

RedirectURLs is depend on what url you need redirect.The selected data will use in next.
2.On the certificate editing page, you can see your Certificate

Step3:Configure application in ShardingSphere
First we need find the application.properties we need configure

Second we need copy the data in Casdoor application and paste them into application.

Now we can use it
The operation and maintenance platform has no direct relationship with ElasticJob. It displays the job status by reading the job registration center data, or updating the registration center data to modify the global configuration.
The console can only control whether the job itself is running, but it cannot control the start of the job process, because the console and the job server are completely separated, and the console cannot control the job server.
The job will be automatically added the first time it runs. ElasticJob is started as a jar and has no job distribution function.